If you have multiple email address then this tutorial about how to automatically forward your emails will be particularly useful.
I know what its like to save an inconvenient number of email addresses. One for university, one for my part time job and my personal email address. In order to make sure I never miss one, I have them all forwarded to a single account. As a result, as soon as I receive an email in any of my accounts, they are sent to my personal email address as well so that I can see them on my phone, all in one place.
Its so convenient and if you want to do the same (which I recommend,) then read on.
How To Automatically Forward Your Outlook Emails
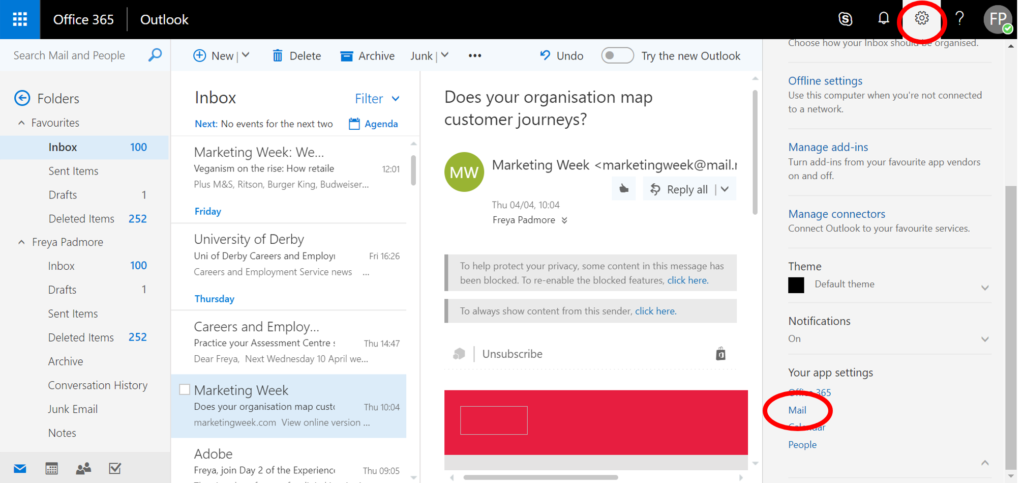
Step 1: Open up Outlook and go to settings.
Step 2: Under ‘Your App Settings’, click on ‘Mail’.
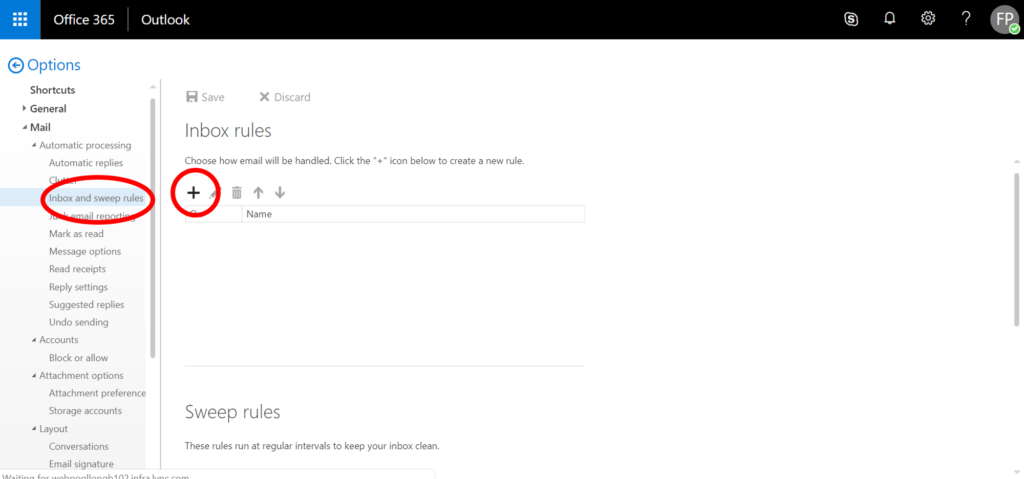
Step 3: Under ‘Automatic Processing’, go to ‘Inbox and sweep rules’ and click the + button to make a new rule.
Step 4: Label your rule and select ‘Apply to all messages’ from the conditions options.
Step 5: Under ‘Do all of the following’, select ‘Forward, redirect or send’ amd then select ‘Forward the message to…’.
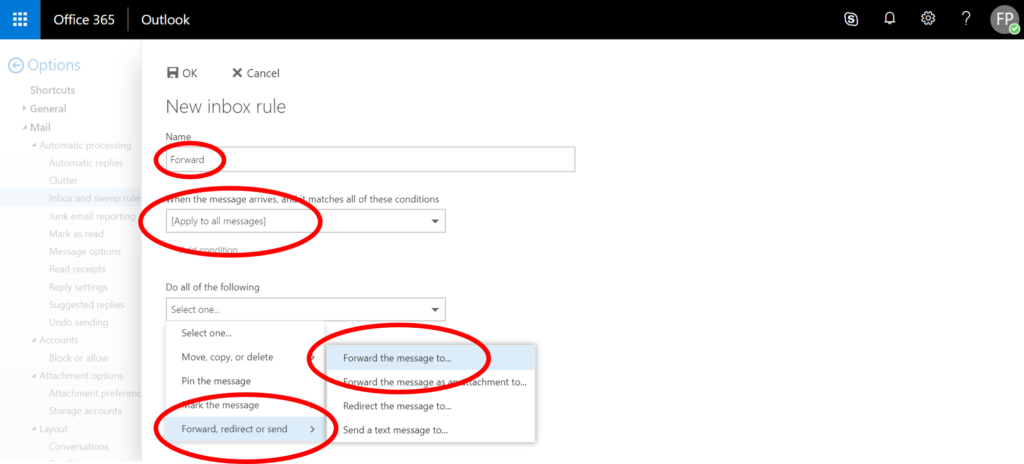
Step 6: Select the email address you want your emails to be forwarded to and remember to press save.
How To Automatically Forward Your Gmail Emails
Step 1: Log onto your Gmail and click settings in the top right corner.
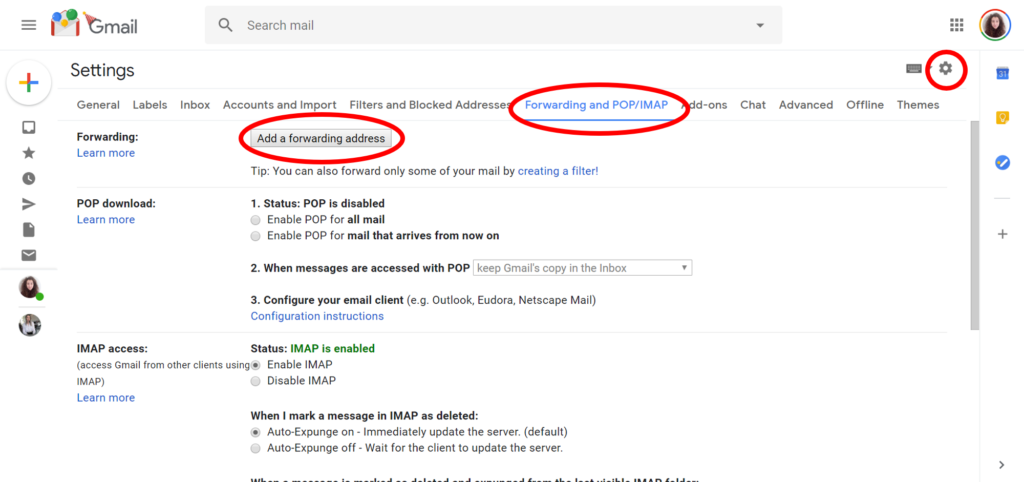
Step 2: Click the ‘Forwarding and POP/IMAP tab.
Step 3: Click ‘Add a forwarding address’ and enter the email address you want your emails to be forwarded to. Next, click ‘Proceed’ then ‘OK’.
Step 4: Verify your chosen email address by clicking the link sent in a verification email to the address.
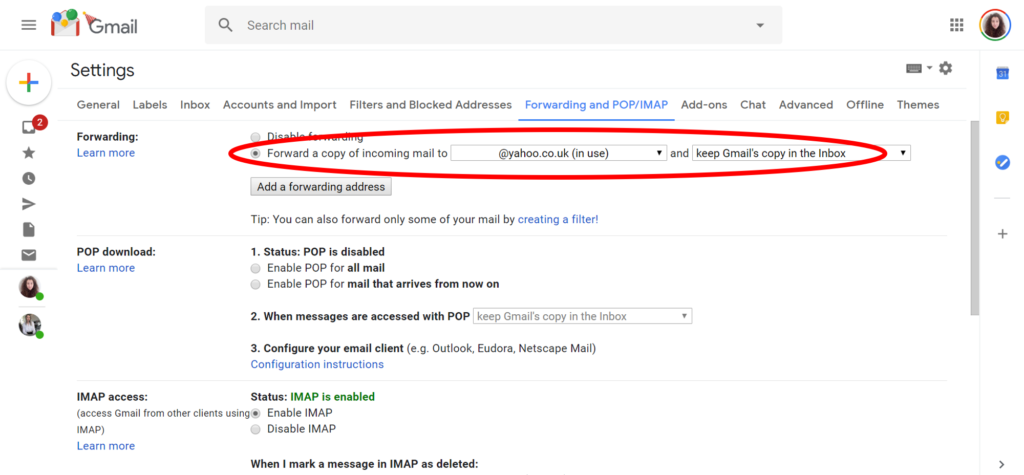
Step 5: Go back to your settings and select ‘Forward a copy of incoming mail to’ and ‘Keep Gmail’s copy in the inbox’.
Step 6: Scroll to the bottom of the page and save your changes.
Hopefully you have all found this tutorial useful. I would definitely recommend doing it if you’re a student or anyone with multiple email addresses. It saves a lot of time having to check multiple addresses and ensures you never miss an email.
Let me know if you have any comments down below and I hope you have a great day.